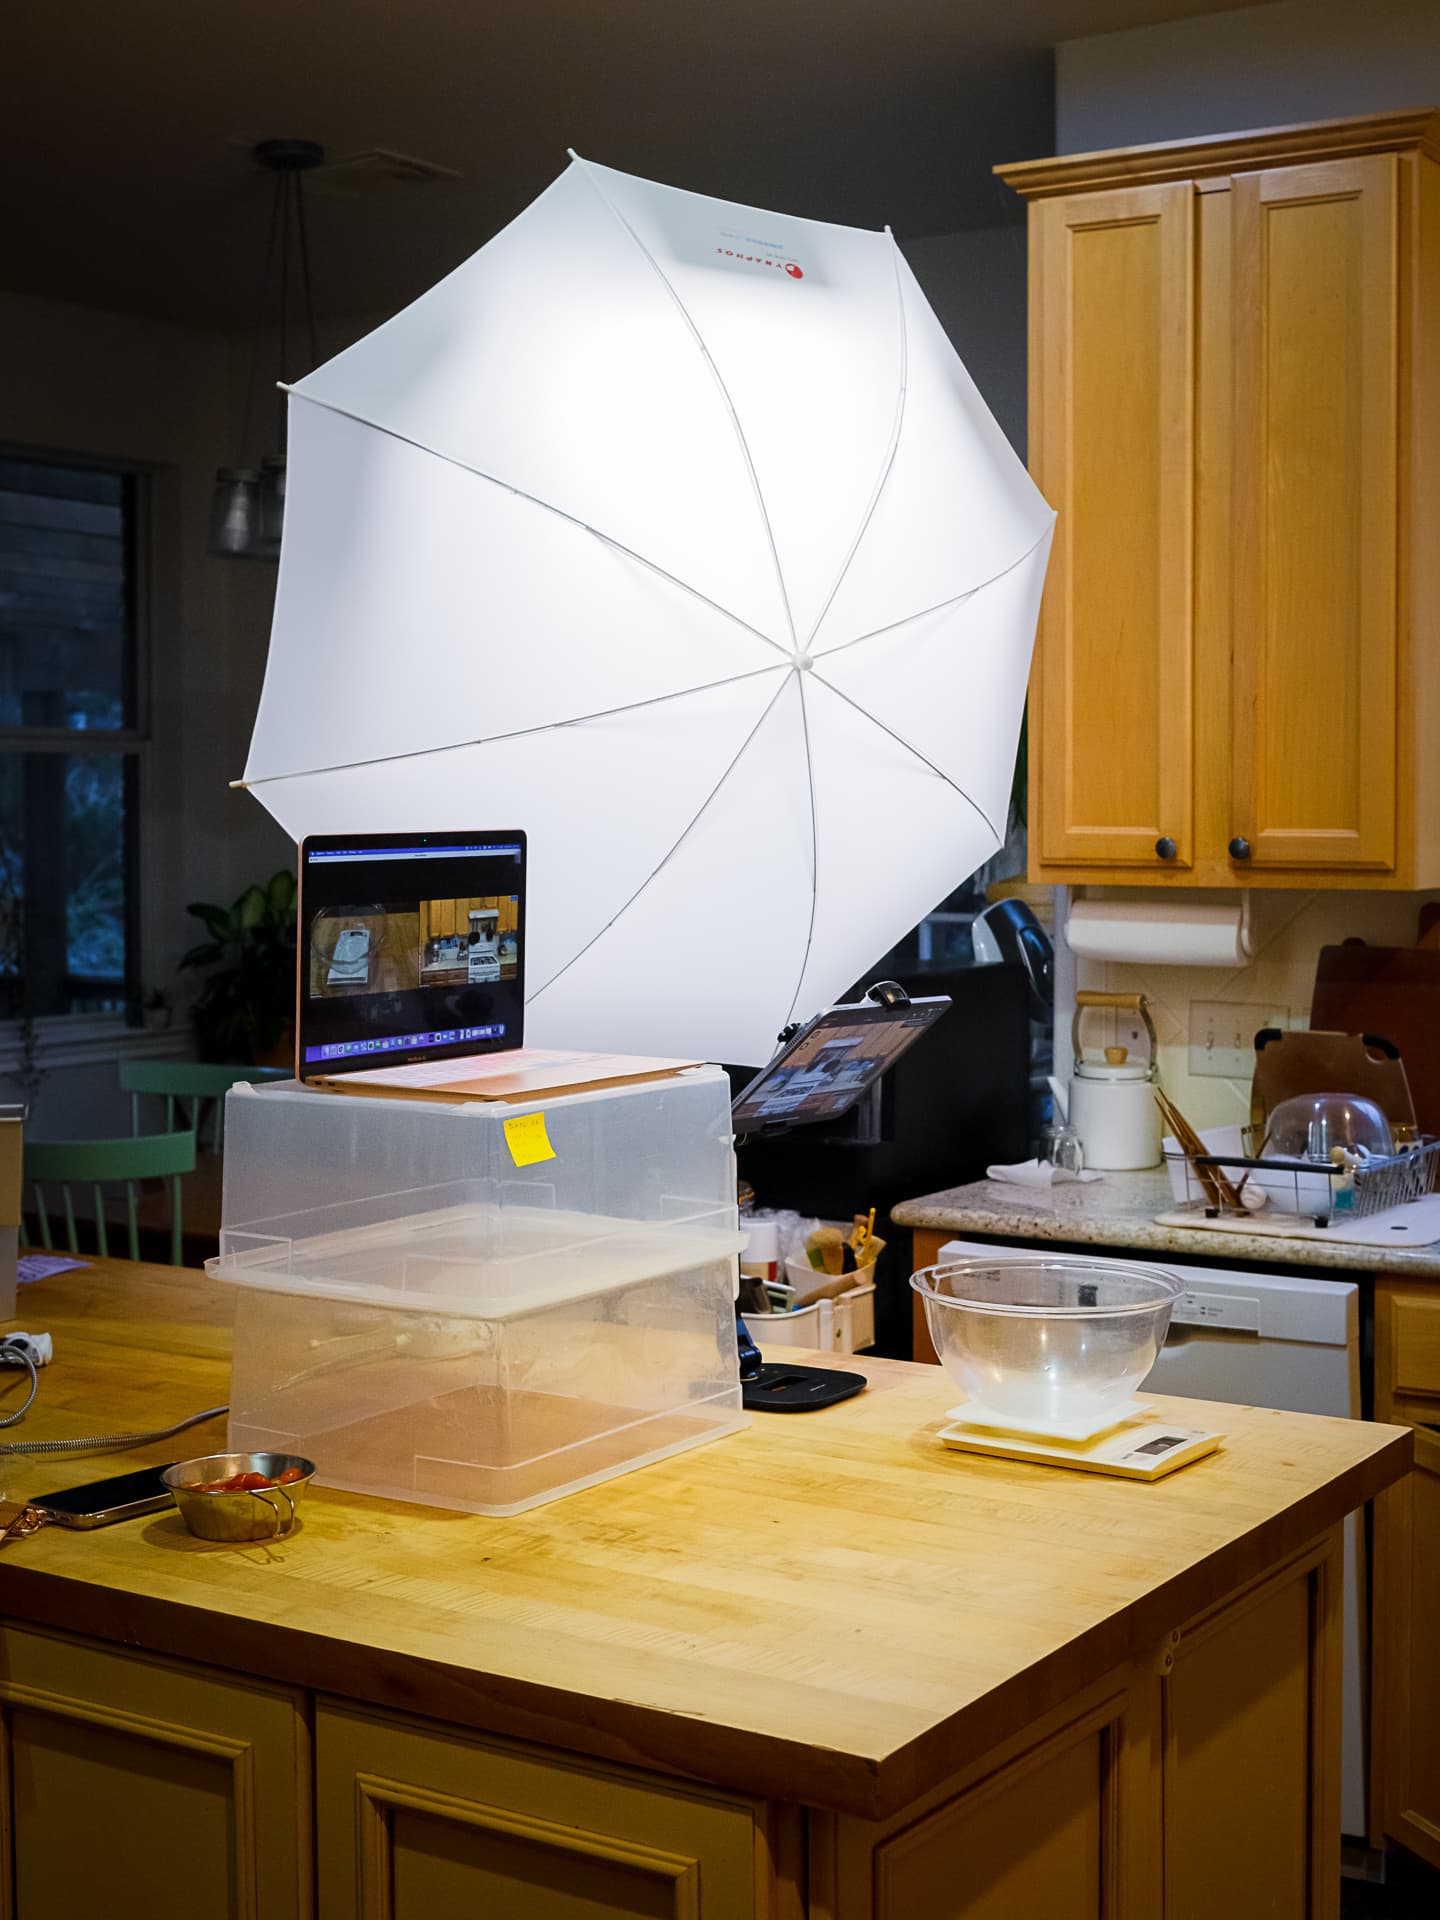
Photo info: FUJIFILM X-E4, 27mm, f/5, 1/40 sec, ISO1600 “Lighting Kit” Cedar Park, 2022
My wife used our Neewer 660 lighting kit for the first time last night during a pizza lesson. It worked out nicely! The shoot-through umbrella is a little obtrusive, but the diffused light and soft shadows that it creates is worth it.
Photo info: FUJIFILM X-E4, 27mm, f/4, 1/100 sec, ISO640 “Lighting Kit” Cedar Park, 2022
We received a new Neewer 660 LED Lighting Kit today and it seems pretty good! Just a few days ago I sold my old studio flash and switched to these continuous lights which will be good for stills and video.
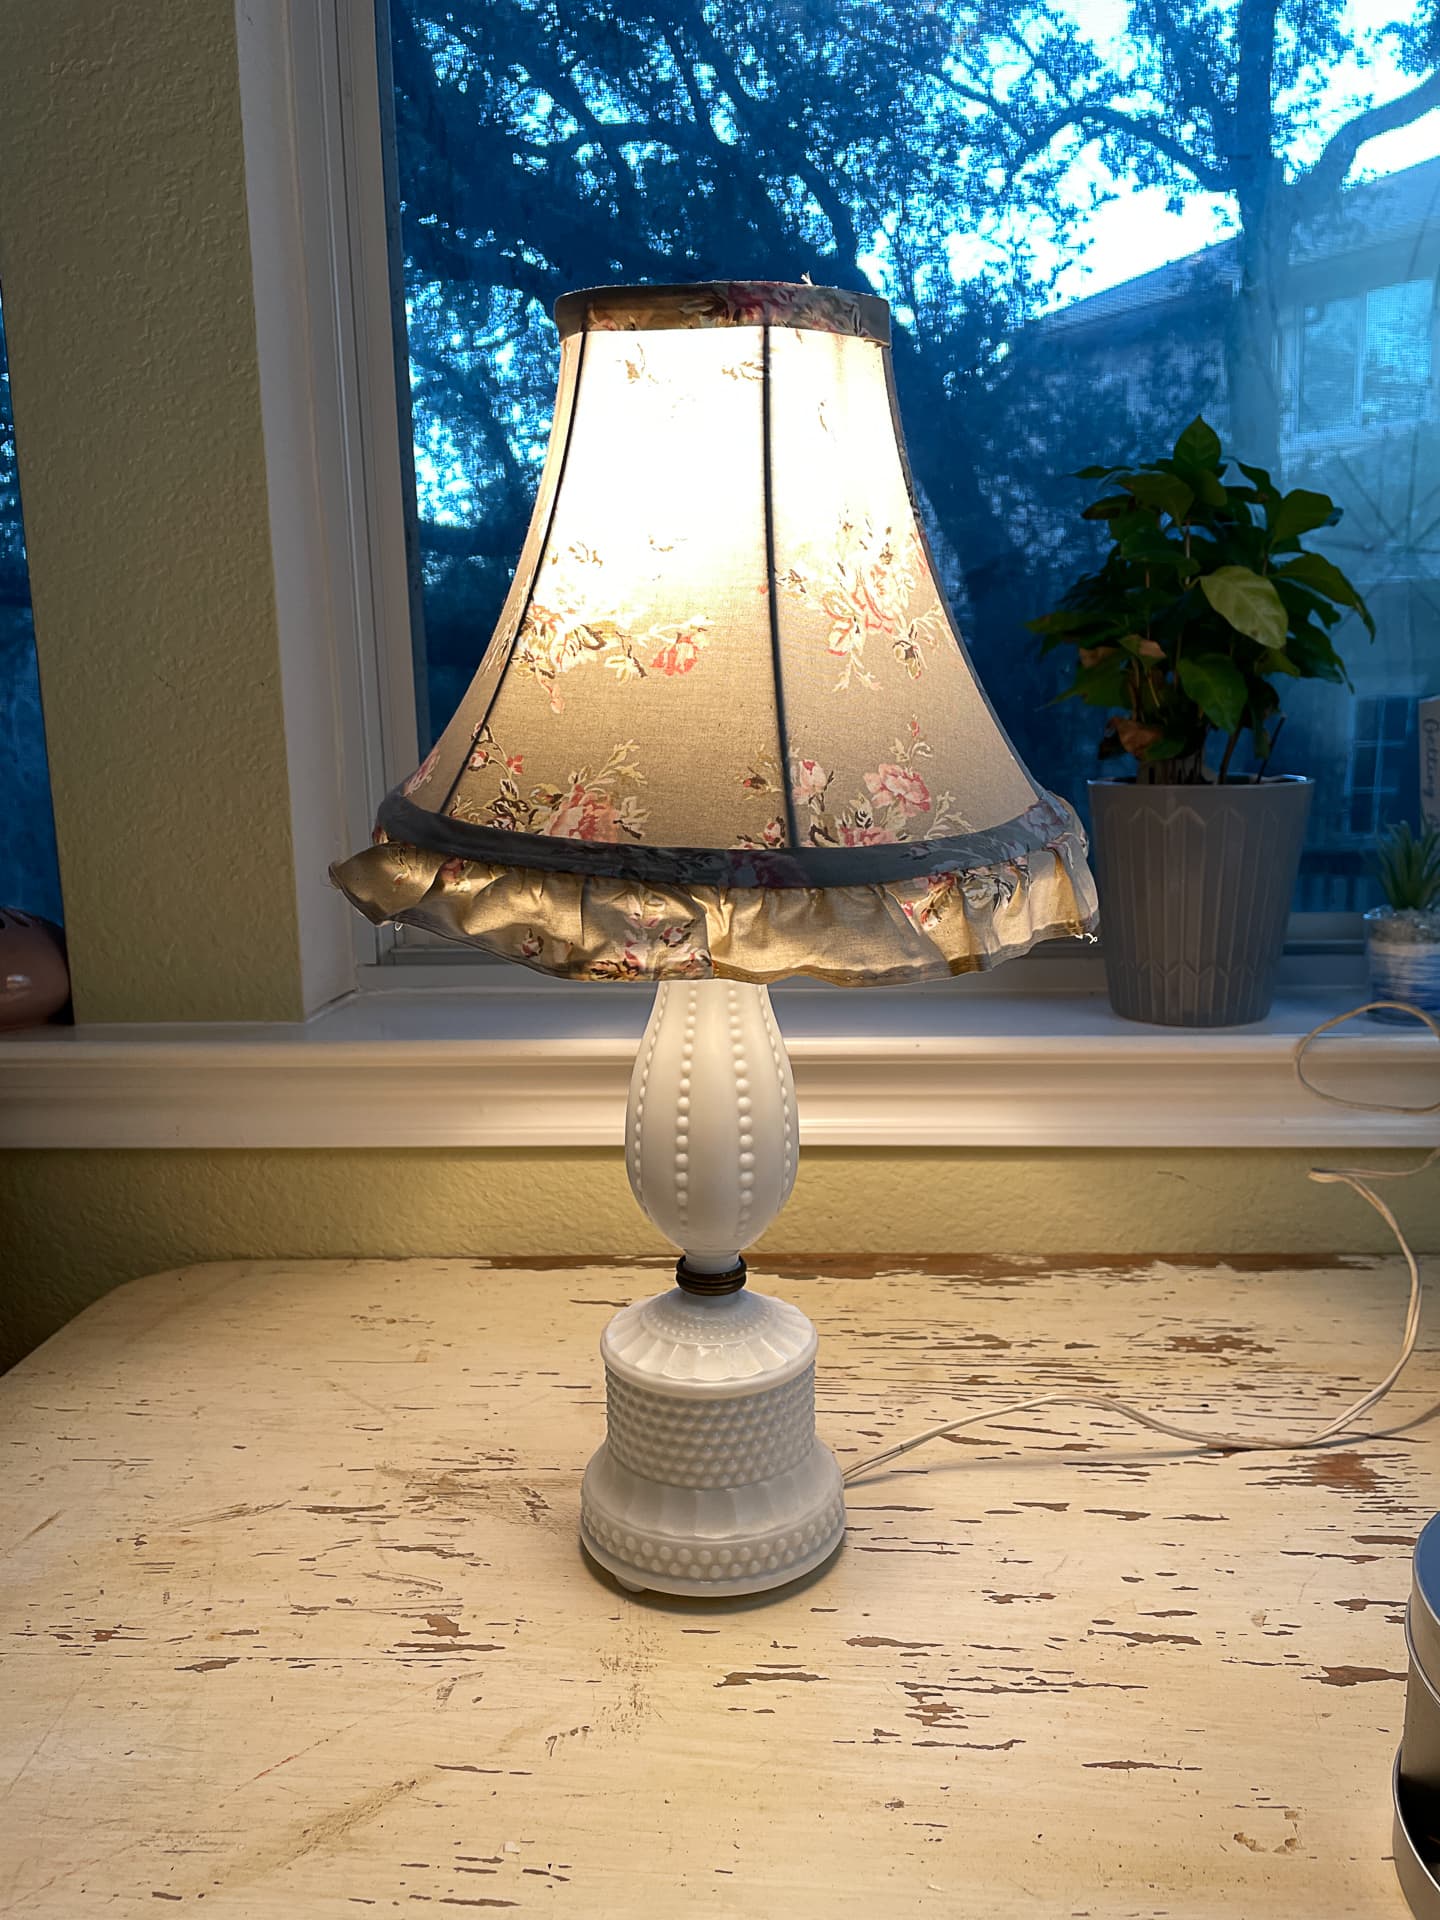
The kit we chose comes with two lights/stands, but doesn’t have any soft boxes. However, I have a shoot-through umbrella that I was able to use and it works great. The first photos I took were of an antique lamp that I am trying to sell on Facebook Marketplace. I think it looks nice!
Photo info: Apple iPhone 12 mini, 4.2mm, f/1.6, 1/120 sec, ISO64 “Lamp for Sale” Cedar Park, 2022
For the second lamp, I might purchase the Neewer soft box just to see how it compares to the umbrella. I’ll post again when I get it, but it might not be for a while yet.
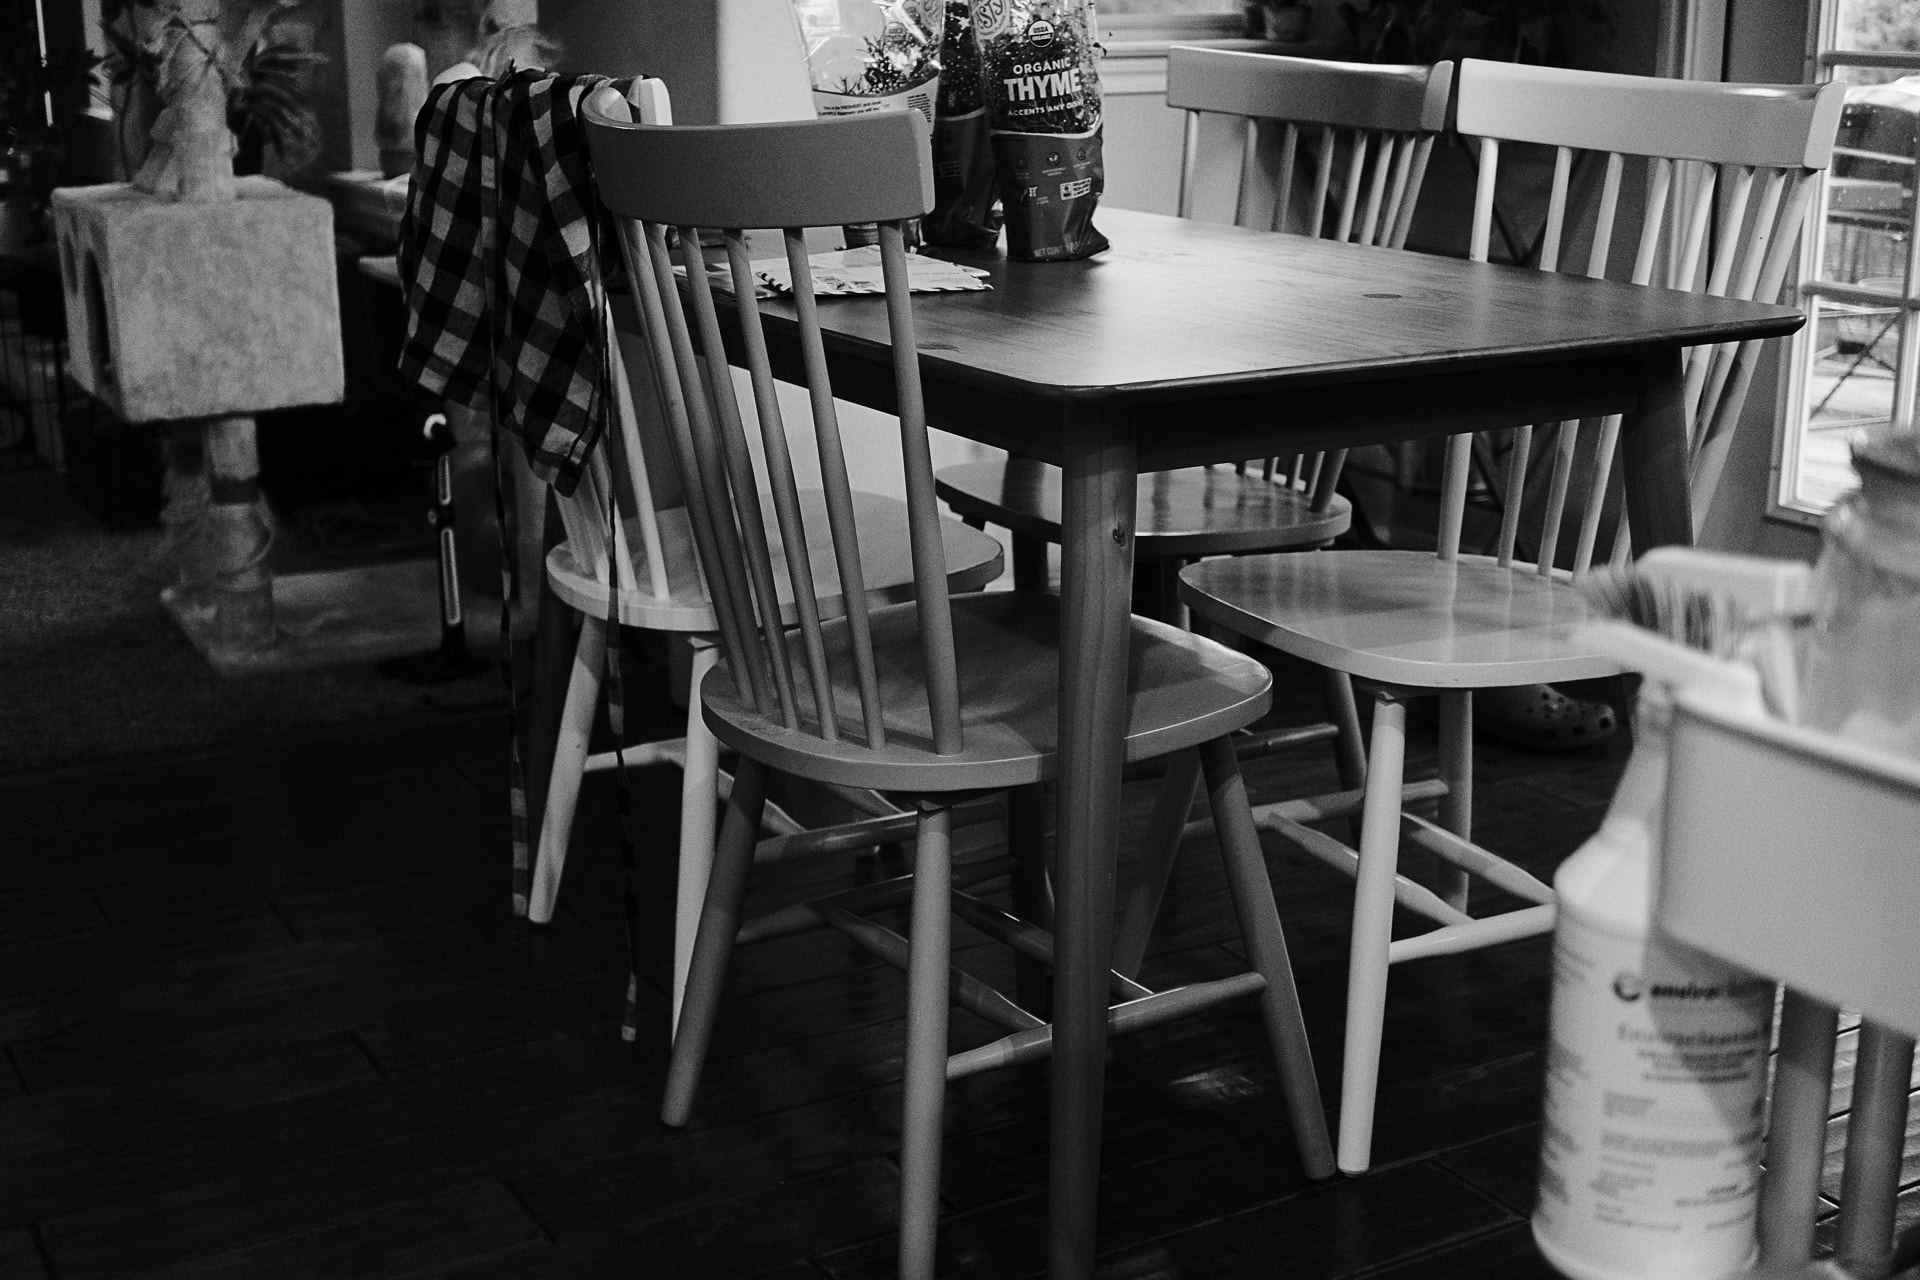
Photo info: FUJIFILM X-E4, 27mm, f/2.8, 1/80 sec, ISO3200 “Black and White” Cedar Park, 2022
A few times a year I think that I should try to shoot a whole month in black and white. But I’ve never been successful at it. Will this be the year? I doubt it. But stranger things have happened. 😆
But seriously, it would be fun and interesting to study and practice black and white photography, wouldn’t it?
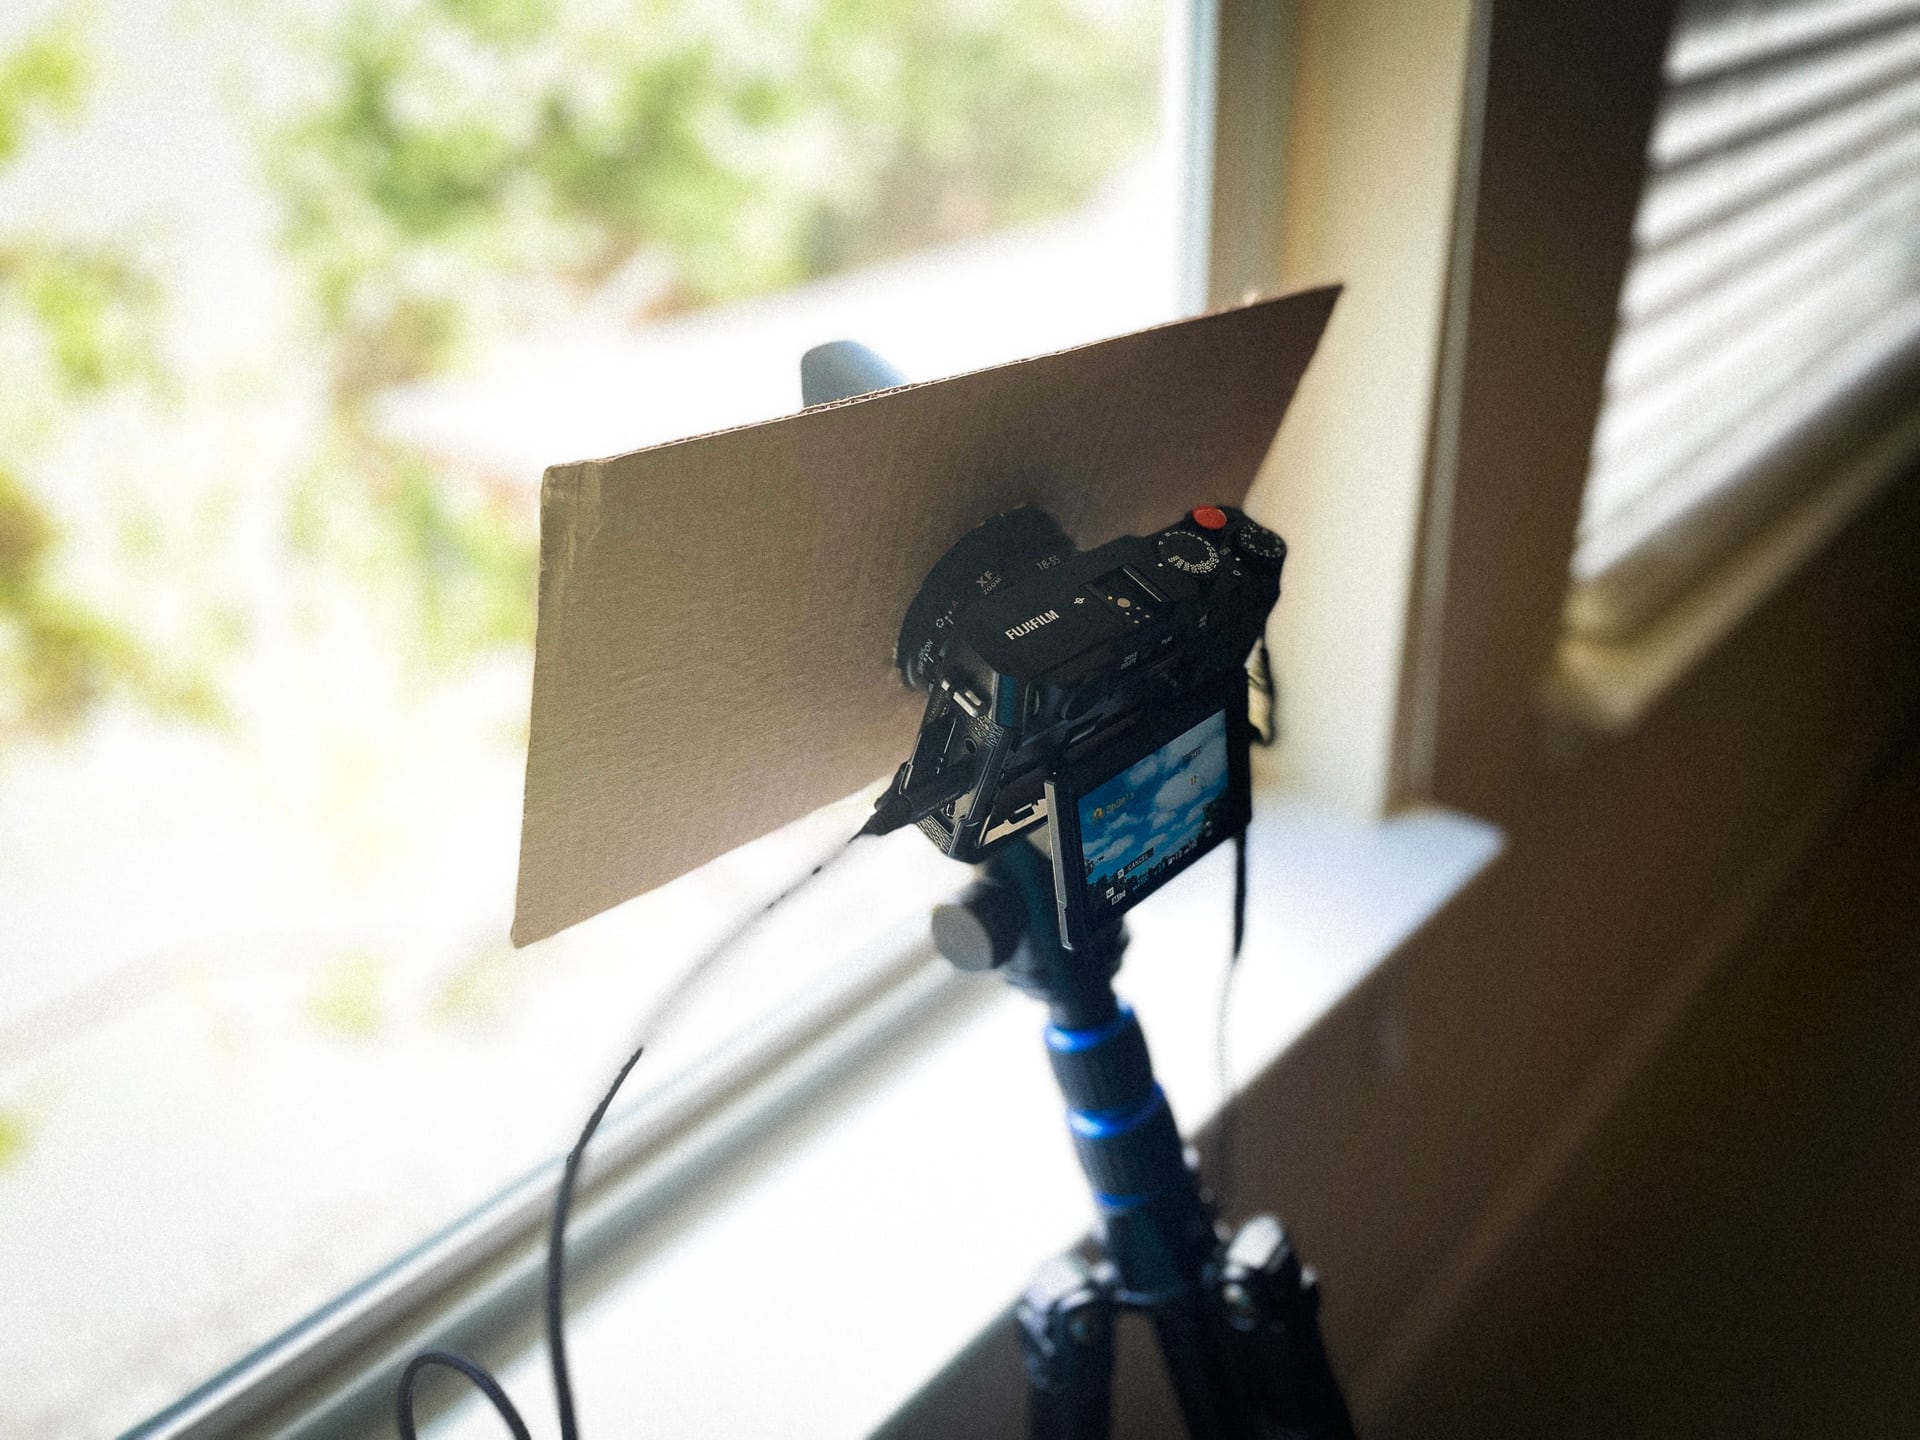
Photo info: Apple iPhone 12 mini, 4.2mm, f/1.6, 1/120 sec, ISO32 “Sun Shield” Cedar Park, 2021
My Fujifilm X-E4 camera shut off during shooting a time-lapse sequence the other day, so I was unable to capture the sunset I was hoping for. I believe what happened was the camera overheated and shut itself down. This has been known to happen while recording long, high-resolution videos, but I hadn’t experienced this with just shooting stills.
In order to stop this overheating from happening again, I made this cardboard shield to block the sun. I also have changed the image size that the camera is capturing frames to “medium” which is large enough to produce a 4K video sequence.
It appears the shield worked as intended as the camera was able to keep shooting even with the afternoon sun hitting the shield. Yay!
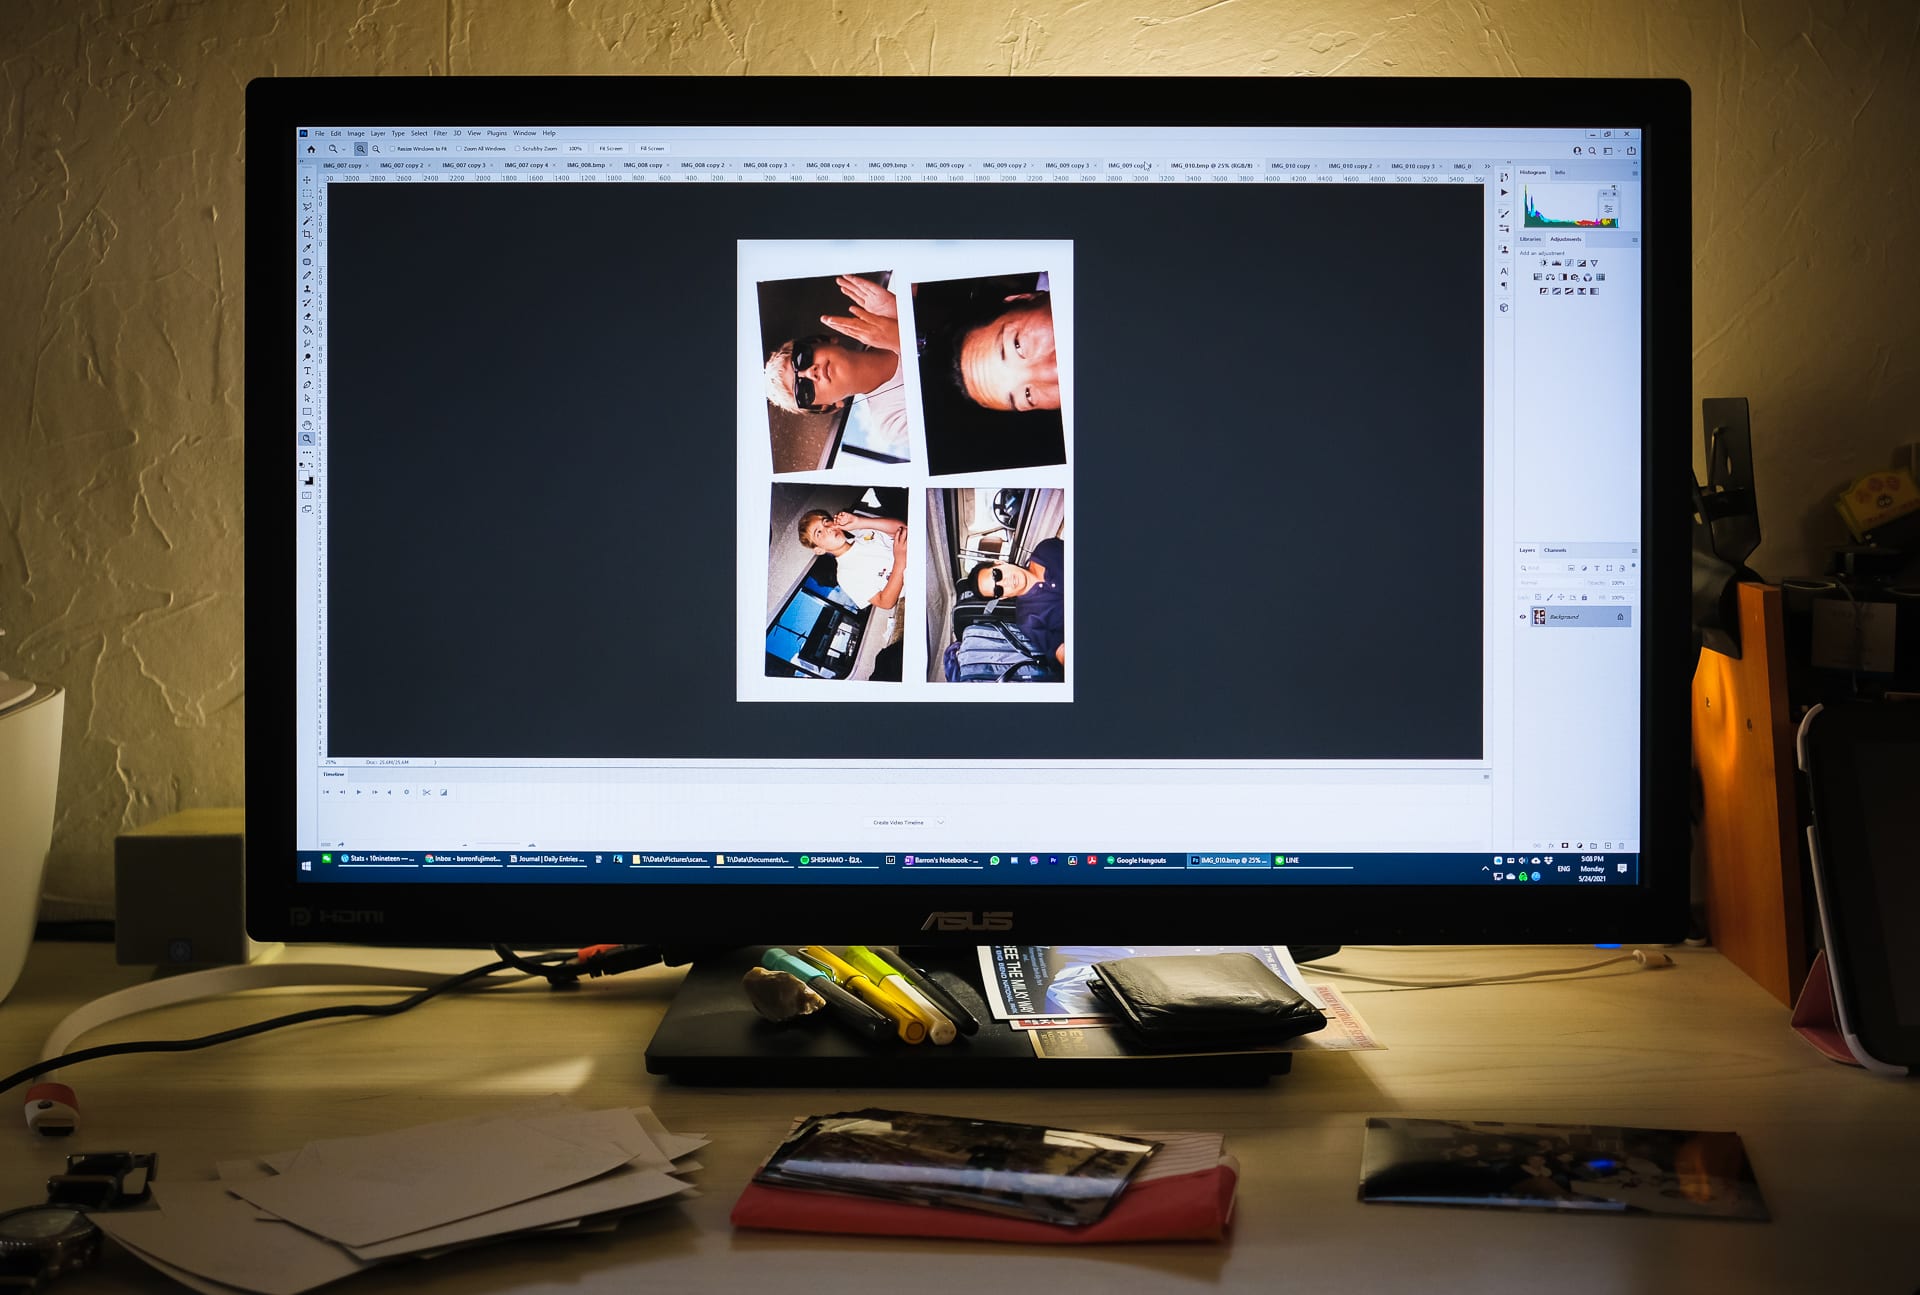
Photo info: FUJIFILM X-E4, 27mm, f/2.8, 1/100 sec, ISO800 “Scanning Snapshots” Cedar Park, 2021
I’ve started scanning in old print photos in an effort to declutter the home office and make it easier to browse. I find it much more convenient to look at photos on the computer or iPad than opening a box of snapshots. However, I never started on the large scanning project until now.
It took a bit of tweaking the workflow, but I think I have optimized and automated it as best as I could using my Epson 4490 Scanner and Adobe Photoshop. The basic steps are:
Place multiple photos on the scanner bed. I can fit four 3×5″ or two 4×6″ photos per scan. I find it best to offset/skew the photos a bit so that they DO NOT line up. This will help out later.
In Photoshop, choose File > Import > WIA Support… Select a destination folder and check “Open Acquired…”, then Enter. Next select the scanner and Enter. For my particular scanner, I have the option to scan at a custom DPI, and I chose 300 DPI. I have the scan area set to the entire scanner bed, and I do not use Preview. Just Scan. I mapped the F9 key to launch WIA Support, so I can just type F9, Enter, Enter, C (to select custom), and Enter. The scanner will do it’s thing, and the BMP will open in Photoshop. The destination folder is where Photoshop will save the BMP files, which I will delete later.
Choose File > Automate > Crop and Straighten Photos. This will create separate images for each photo in the BMP file (see the photo above). I’ve set this command to be my F10 key. If the photos are too close together or lined up too well on the scanner bed, Photoshop might think they are a single photo, which is why it’s better to place them askew on the scanner bed. In my workflow, I CTRL+TAB to check the images and rotate any images that need it (I have F12 mapped to Rotate 90 degrees clockwise). At this point you can save each image if you’d like, but since I want to scan many more photos, I remove the photos from the scanner, and begin again.
After I have scanned several batches of photos (and Photoshop is filled with windows), it’s time to save the files. Because the cropped/straightened images are not actually saved as files, the Image Processor script I want to use in Step 5 will not work (yet). So, we need to temporarily save all the open images. The easiest way I’ve found is to type CTRL+ALT+W to close all images. In the dialog box, check Apply to All, then Yes. In the next dialog box, select a folder where the individual BMP files will be saved. Then I just hit enter for each subsequent dialog box.
Next, I will save all the BMP files as JPGs. In Photoshop, choose File > Scripts > Image Processor… In the dialog box’s step 1 section, choose the folder where you saved the individual BMPs from Step 4. In the next section, I then to save the processed image into a new folder. Choose any other desired settings, then click Run. I mapped the F11 key to run the Image Processor. You will now have a folder full of JPG images!
Lastly, delete all the BMPs that were created in Step 4 (and step 2 if you wish) and you can start on the next batch.
That’s pretty much the process I have been using and it works well for me. What’s nice is that Photoshop will create new names for each file (and not overwrite). I definitely recommend mapping the keys for the Photoshop menu items. It makes it much quicker!
Here’s my process in a nutshell: Put the photos on the scanner, type F9, Enter, Enter, C, Enter. I wait for the scanner to finish, then hit F10. CTRL+TAB to check the photos and F12 any photos that need rotating. Then I start the next batch of scanning. After I have many open files, I hit CTRL+ALT+W to save and close the files. Then F11 to create the JPG files. Delete the BMP files and begin the next batch. Easy-peasy! I don’t even need to touch the mouse except to delete the BMPs in File Explorer.
I hope this helps out anyone who wants to scan a bunch of snapshots!
Like this:
LikeLoading...
My camera & photos
I use a Fujifilm X-series camera for most of the photos on this site and my Instagram. Why not pick one up for yourself?