ASUS RT-AC1200 Router and Chromecast

I wanted to post this little PSA in hopes it helps save someone a bit of frustration.

We recently switched our ISP (Internet Service Provider) and needed to buy a new router. We went with the ASUS RT-AC1200 router, which isn’t gigabit, but since our service’s bandwidth caps at 100 Mbps, we didn’t need the extra throughput.

For the most part, the router works great, but we did have some trouble with getting our Google Chromecast to work with the router. It had trouble keeping connected to the ASUS router. Even the setup via laptop or smartphone was difficult and wouldn’t finish successfully. Sometime we’d be able to see the Chromecast from other devices, and the Chromecast even indicated that it was connected to our network, but it we couldn’t cast with any reliability. I tried many things, and finally figured out the correct setting for the router.

TL;DR

Make sure the 2.4GHz access point is set to “Legacy”. Also, you may try disabling IPv6. If that doesn’t work, the last thing to try is to disable the router’s firewall feature.

After setting this, and rebooting the router, the Chromecast stays connected to the network and we can cast from all devices without problems!

Scheduling Google Photos Backup

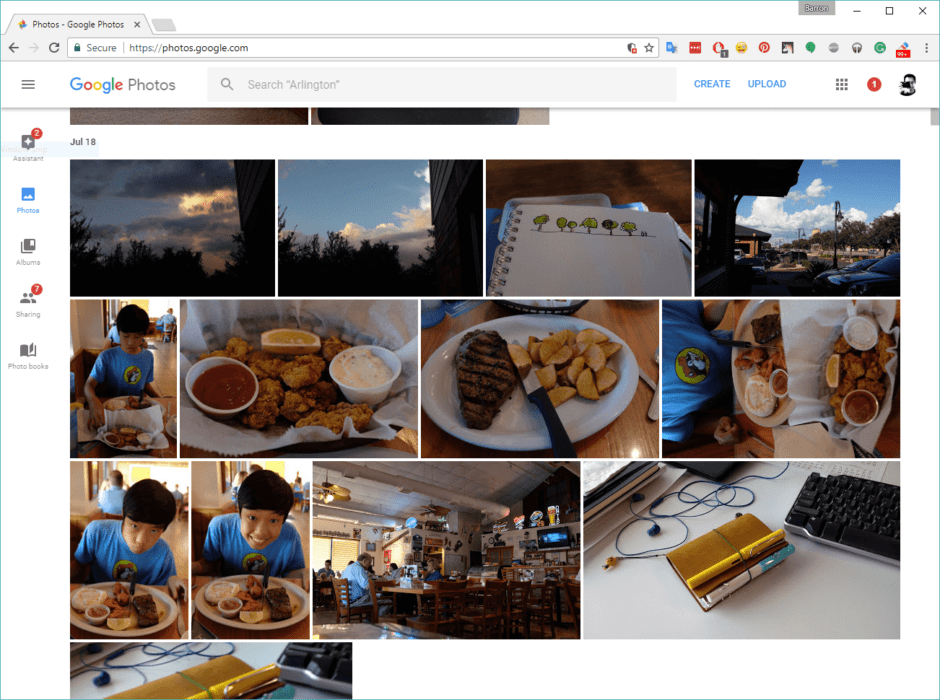
Like many amateur photographers, I take photos every day and use Lightroom to edit them on my computer. I like to use Google Photos Backup to make a secondary backup of my photo directory which can be useful because I can take advantage of Google’s amazing image search algorithms to find photos quickly. Say I want to find a photo of some sushi I know I took, but don’t know exactly when I took it, I can just search for “sushi” or the place I was at when I ate it, and after Google finds the photo, I can go to Lightroom and zero in on the date to find the original photo. Saves a lot of time! Just the other night, we wanted to know when we adopted our dog, Lani, and by simply searching for “dog” we were quickly able to find out the month and year we brought her home.

However, there are two drawbacks to using Google’s automatic photo backup.

  • First, when it is uploading photos, it kills our Internet bandwidth here at home. (“Papa! Why is the Internet so slow?!”)
  • Secondly, it will automatically start uploading photos as soon as I import them into Lightroom. This happens before I delete the unwanted photos, so my Google photos online library gets cluttered with photos I don’t need. For a while, I dealt with this by pausing the backup using the system tray icon (I use Windows) before I imported, but that is a hassle, and I sometimes forgot to do it.

So, to solve both of these issues, I set up an automated task to run in the wee hours of the morning. It took a bit of trial and error, but I finally got it working using Task Scheduler. Here’s how I do it. (I am using Windows 10)

Scheduling Google Photos Backup

First, we’ll create the task that starts the backup:

  1. Open Task Scheduler by opening the Start Menu, typing “Task Scheduler”, and selecting it from the list.
  2. From the Action drop-down menu, select “Create Basic Task”.
  3. In the dialog box, give the task a name. I went with “Photos on”. Then click “Next”.
  4. For the Trigger, select “Daily”, then click “Next”.
  5. Select the date and time you want the backup to begin, set it to recur every 1 day, then click “Next”. I went with 3 AM.
  6. Select “Start a program”, then click “Next”.
  7. Browse to the Google Photos Backup application. Mine was at “C:\Users\barro\AppData\Local\Programs\Google\Google Photos Backup\Google Photos Backup.exe”. Click on “Next”.
  8. Click on “Finish”.

Secondly, we’ll create the task that ends the backup:

  1. From the Action drop-down menu, select “Create Basic Task”.
  2. In the dialog box, give the task a name. I went with “Photos off”. Then click “Next”.
  3. For the Trigger, select “Daily”, then click “Next”.
  4. Select the date and time you want the backup to end, set it to recur every 1 day, then click “Next”. I set mine to 5 AM, giving Google Photos Backup 2 hours every day to do its thing, although it probably only needs a few minutes. YMMV depending on how much you are backing up.
  5. Select “Start a program”, then click “Next”.
  6. In the Program/Script box, type “TASKKILL /IM “Google Photos Backup.exe” /F” (minus the outside quotes), click “Next”, then click “Yes”.
  7. Click on “Finish”. That’s it!

If you want to test that it is working correctly, you can edit the times in steps 5 & 4, after first making sure Google Photos Backup is not currently running.

I hope this helps someone who wants to automate their backup. Just to add, Google Photos is not my primary means of backup. I have two separate backups of all my data on external hard drives, one of which I keep at the office. Also, I’m not an expert at Task Scheduler, so if there’s a better way to do this, please let me know!

Little green men

"Update" Cedar Park, 2017
Photo info: FUJIFILM X100T, 23mm, f/2.8, 1/100 sec, ISO1600
“Update” Cedar Park, 2017

こんばんは。

Today I got a nice surprise in that my phone received an update! I know, it’s a silly thing to get excited about but still, I love the little goodies that come with the software refresh. This time, I am most happy with the option to have a different wallpaper for the home screen and lock screens. I actually used to be able to do it when I had a different home screen launcher, but these days I am too lazy to add all the fancy stuff to my phone. I like to keep it streamlined (which is why I have a Moto G that runs a barebones version of Android) and simple. But if that stock experience includes cool animations and goodies with Android N, then it’s a win-win!

I hope you had a nice Friday.

またね~

Lost in Translation no more with Word Lens in Japanese

Let Google Translate help you find your way through Japan, now with instant translation

Source: Lost in Translation no more with Word Lens in Japanese

This is so cool! The future is here. 😃 And it works in real-time, with the translated text automagically appearing over the original like some hyped-up photoshop wizardry. Take a look at this photo I took of the feature in action:

Photo info: FUJIFILM X100T, 23mm, f/9, 1/85 sec, ISO6400

I wish I could take credit for finding that awesome sign, but it was one of the first Google search results.

Thanks to my brother for sending me the link to the article!

Busy Busy

"Carrot Flowers" Cedar Park, 2016
Photo info: FUJIFILM X100T, 23mm, f/5.6, 1/340 sec, ISO6400
“Carrot Flowers” Cedar Park, 2016

こんばんは!How’s it going?

Wow, today was a busy day.

While Mariko is preparing the New Year’s osechi feast, I am in charge taking care of the kids and running other errands. That included buying a new hard drive for one that is on the blink, taking Bay to get his haircut, dropping Koa off at his friend’s house, going to the pet store, dropping Bay off at the mall, picking up our dog Lani from the sitter, changing out water from the aquarium, giving Lani a bath, cleaning the battery terminals on my minivan, and picking up dinner (In N Out, yay!).

I got a lot done, but one of the fun things I did was to buy a new phone! My Moto G2 is getting really slow, and Mariko and the kids have been telling me to upgrade for a while now, so I finally pulled the trigger and ordered a new Moto G4. There is a good deal on Amazon right now – the 32 GB version for $189 (normally $229). I really like my G2 but it only has 8 GB of internal storage so I have run out of space for apps. And it’s not like I have a lot of apps, but the standard Google apps have gotten so big that they take up almost all of the internal memory!

I’m pretty sure 32 GB should last me a while, and of course there’s the SD card so I can pop in my 64 GB card for my music and photos.

The phone arrives in a couple days… can’t wait!

Today’s photo is of some carrots that Mariko carved into beautiful flower shapes. They will be part of the osechi, or Japanese new years food.

I hope you had a nice day!

おやすみなさい!

– B Barron Fujimoto